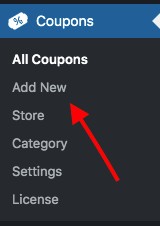
Once you have uploaded and activated your license for Coupon Plugin Pro, you will find the plugin options inside your WordPress admin under the Coupons tab in the side bar.
![]()
Here’s a quick video walk-through of the process. You can also find the instructions as text below.
Step 1: From the Coupon menu options, select “Add New”.

Step 2: Add a title for your coupon in the top text field. This will be visible as the title of your new coupon widget.
Step 3: Fill out the rest of the options under Coupon Plugin Settings. They should be pretty self explanatory and guidance is provided…
Popular Offer? – Selecting this option will add a “popular” ribbon to the corner of the widget.
Coupon Code – Enter the discount code for your offer. Alternatively, leaving this field blank will display the offer as a “deal” where no coupon is required but the user is still encouraged to click.
Affiliate Link – Enter the affiliate url of the product/offer you are promoting.
Coupon Description – Add some description text if you wish. This will be displayed on the widget and will be readable by search engines as well as site visitors.
Expiry Date/Time – If the coupon has an expiry date, add it here. After this date is reached, the coupon will automatically be unpublished from your site and moved to the “trash”. If you don’t want this to happen or the coupon doesn’t have an expiry date, you can add custom text or leave this field blank.
Vote Up/Down – These fields will change over time as site visitors interact with the widget when it’s on your site. Here you can manually enter a number of up votes as a starting point to prevent misuse, or to adjust the ratio in the future.
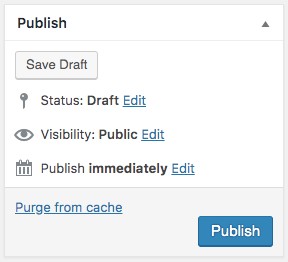
Step 4: After you have filled out all the options as necessary, select the “Publish” button in the right hand side bar.

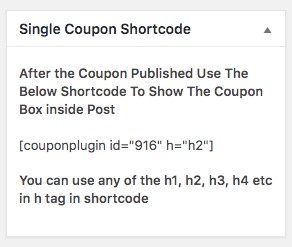
Step 5: To make the new coupon widget visible on your website, you need to insert it’s specific shortcode somewhere on your site.
You will find the shortcode in the top right hand corner. It will look something like this:
[couponplugin id="916" h="h2"]

Simply copy the shortcode and paste it where you want the coupon box to be displayed. For example, within a post or page.
The h=”h2″ refers to the text size of the coupon title. You can adjust to h1, h2, h3 or h4 accordingly to suit your site.
Step 6: There you have it. The widget will be live on your site.
By default, when you are setting up a new coupon with no store/vendor created, the widget will not have an image displayed. To add an image, as well as add vendors and categories for displaying multiple coupons at a time, see this next tutorial.
0
0